 Needle Engine for Blender
Create interactive 3D web experiences directly from Blender. This tutorial will guide you through installing the add-on and creating your first interactive web project in under 10 minutes.
What You'll Learn
By the end of this tutorial, you'll have the Blender add-on installed, a web project running locally, and understand how to add basic interactivity to your scenes.

Prerequisites
Before starting, make sure you have:
Tips
Blender's glTF Exporter has undergone a number of changes in Blender 5.1+ and is still stabilizing. We recommend Blender 5.0 or LTS versions.
Step 1: Install the Add-on
Download
Install
- In Blender, go to
Edit > Preferences > Add-ons - Click the dropdown arrow → Select
Install from Disk - Choose the downloaded
.zipfile → ClickInstall Add-on - Search for "Needle" and check the box to enable it
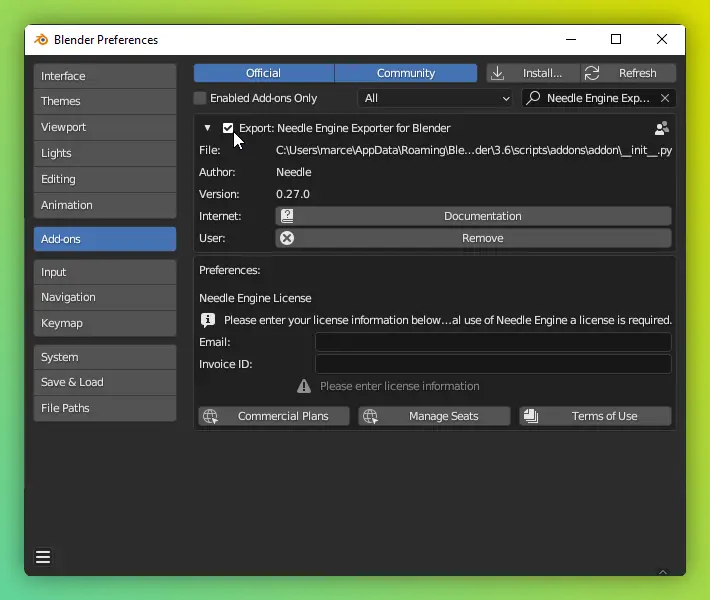
✓ Checkpoint: You should now see "Needle Engine Exporter for Blender" in your add-ons list with a checkmark.
Step 2: Create Your First Project
Let's start with a sample project to see how everything works.
Get Sample Projects
Download and open any sample .blend file in Blender. These samples show what's possible and help you learn by example.
Generate the Web Project
Find the Needle Engine Panel
- Open the Viewport Sidebar (right side)
- Click the Needle Engine tab
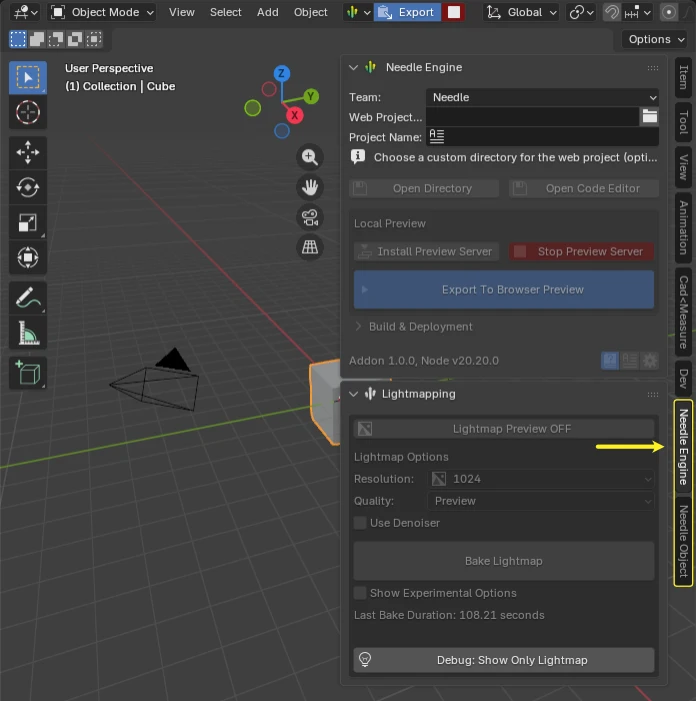
Set Project Path
- Click the folder icon next to
Web Project Path - Choose a location for your web project folder
- This folder will contain all your web files
- Click the folder icon next to
Generate Project
- Click the
Generate Web Projectbutton - Wait while Needle Engine:
- Creates your web project files
- Installs dependencies (may take 1-2 minutes)
- Starts the local development server
- Your browser should open automatically!
- Click the
✓ Checkpoint: You should see your 3D scene running in a web browser. Try rotating the view with your mouse!
Auto-Export
When you save your .blend file, Needle Engine automatically re-exports your scene and refreshes the browser. This hot reload makes iteration super fast!
AI-Assisted Workflow
Need help with Needle Engine while working in Blender? Connect AI coding assistants like Claude, Copilot, or Cursor through Needle MCP — they can search your scene hierarchy, inspect objects and materials, read project context, and help you write components. You can also use the built-in Ask AI about Project action to get answers directly in Blender. Learn more about Needle MCP →
Step 3: Set Up Environment Lighting
Your HDRI environment is automatically exported and used for lighting — objects in your scene will reflect it and receive ambient light from it. The visible background is separate: it can show the skybox or render as a solid color.
To set up your environment:
- Open Viewport Shading options (top right of 3D viewport)
- Assign an HDRI cubemap
- Optionally, set
World Opacityto 1 to also show it as the background skybox
✓ Checkpoint: Save and check the browser — your scene should now have environment lighting (and a visible skybox if you set World Opacity to 1)!
Learn more about environment lighting → — custom HDRIs, automatic compression for fast loading, and more.
Step 4: Add Basic Interactivity
Now let's add camera controls so users can explore your scene.
Add OrbitControls
- Select your camera in Blender
- Find the Needle Object panel (in Viewport Sidebar)
- Click
Add Component - Search for
OrbitControlsand select it
- Save your Blender file (Ctrl/Cmd + S)
- Watch the browser refresh automatically
✓ Checkpoint: You can now click and drag in the browser to orbit the camera around your scene!
Understanding Components
Components are reusable behaviors you add to objects. Needle Engine includes 100+ built-in components:
- OrbitControls - Mouse/touch camera controls
- Rigidbody + Colliders - Built-in Rapier physics simulation
- SyncedRoom + Voip - Multiplayer with voice chat
- Animation - Play animation clips
- WebXR - Enable VR/AR with one click
- DragControls - Make objects draggable
- VideoPlayer, AudioSource, ParticleSystem, and many more!
Step 5: Set Up Color Management
By default, Blender uses Filmic which makes colors look different in the browser. Switch to Standard so what you see in Blender matches the web output.
Go to Render Properties tab
Find Color Management section
Set
Viewto Standard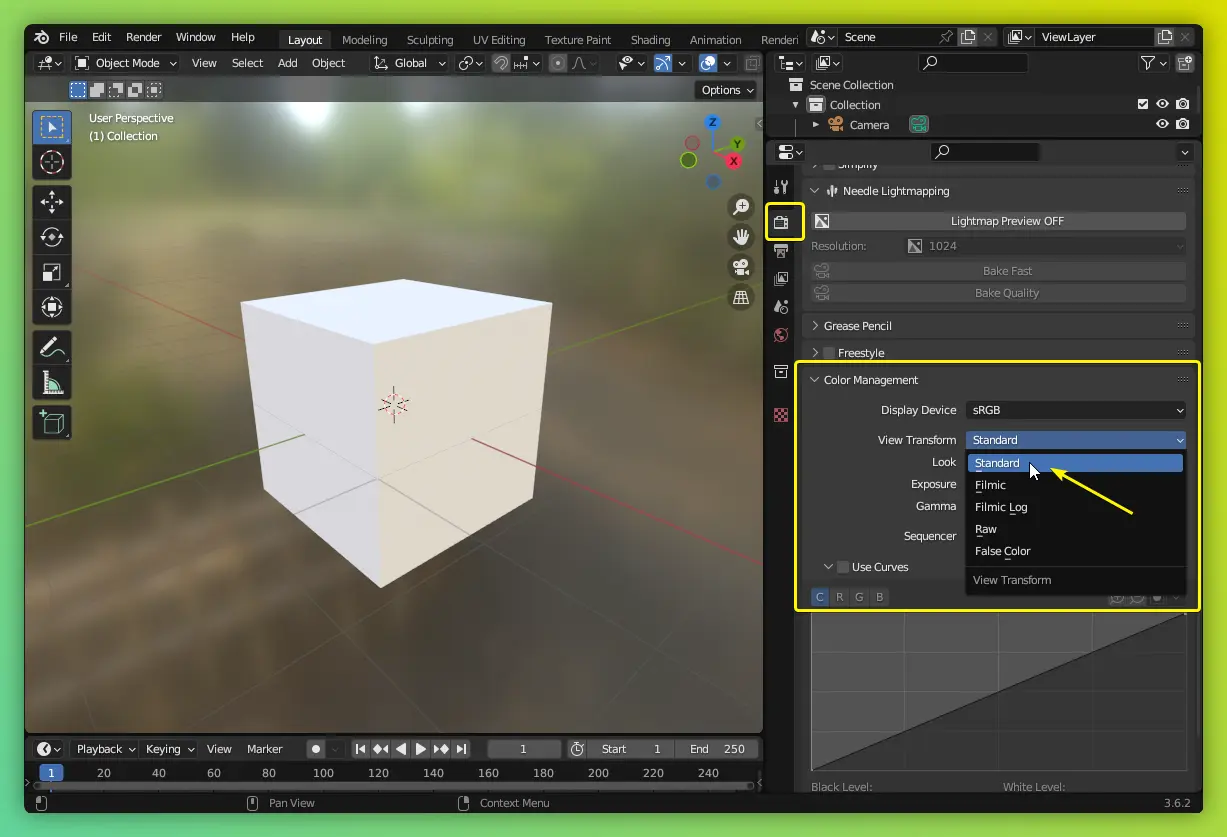
✓ Checkpoint: Colors now match between Blender and the web!
What You've Learned
Congratulations! You've just:
- ✅ Installed the Needle Engine add-on
- ✅ Created and launched a web project
- ✅ Added interactive camera controls
- ✅ Configured colors and environment lighting
Your Blender scenes are now running on the web with hot reload!
Next Steps
For Blender Artists → Comprehensive guide covering what you can create without code, workflow tips, and when you might want scripting.
- Environment Lighting → — custom HDRIs, skybox settings, and automatic compression
- Animation → — playback, state machines, and timeline export
- Components → — 100+ built-in behaviors and creating your own
- Lightmapping → — baked lighting for stunning visuals with great performance
- Deploy Your Project → — publish to Needle Cloud or self-host
- Sample Projects → — interactive examples to learn from
- FAQ → — common questions and troubleshooting
Getting Help
Discord Community → Ask questions and get real-time help from the community.
Forum → Detailed discussions and solutions.
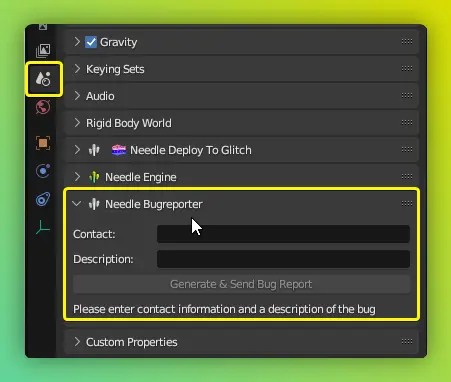
Bug Reporter: Built-in tool in Blender (Help > Needle) for complex issues.
Share Your Feedback
Your feedback helps us improve! Tell us what you think in the forum