Production Build Settings
Optimization & Compression
This guide is part of Optimization & Compression. See also: Texture Compression, Mesh Compression, Progressive Loading & LODs.
Configure how Needle Engine compresses and optimizes your project for production deployment.
Understanding Build Types
Development Builds
Development builds are optimized for fast iteration during development:
- No texture compression (KTX2) – faster build times
- No mesh compression (Draco) – faster build times
- No progressive loading – simpler debugging
- Larger file sizes – not suitable for production
When to use: During active development and testing.
Production Builds
Production builds are optimized for performance and file size:
- Texture compression using KTX2 (ETC1S or UASTC)
- Mesh compression using Draco or Meshopt
- Progressive texture loading for faster initial load
- Automatic mesh LODs for better performance
- Minimal file sizes for fast loading
When to use: For deployment to production websites.
 Unity Build Window
Open File → Needle Engine → Build Window:
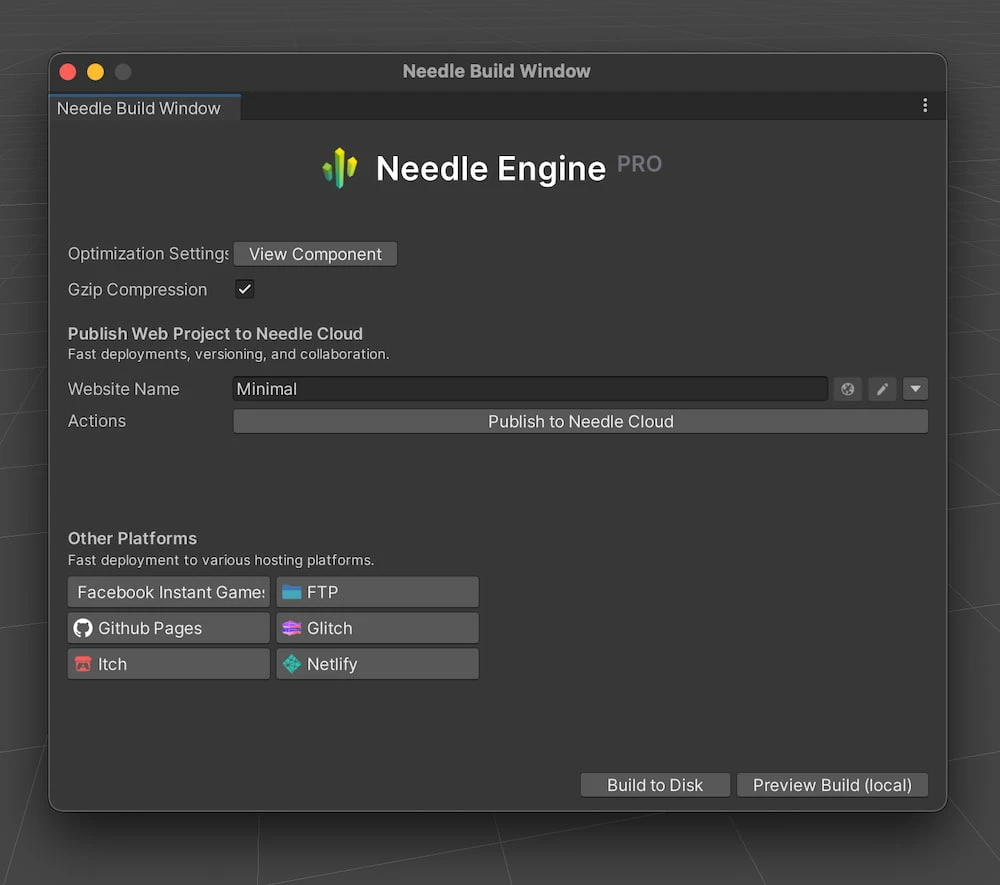
Available Options:
- Build to Disk – Create production build in the
distfolder - Preview Build – Build and start a local server to preview the final result
- Development Build – Disable compression for debugging (not recommended for production)
 Blender Build & Deployment
In the Viewport Sidebar → Needle Engine tab, find the Build & Deployment section:
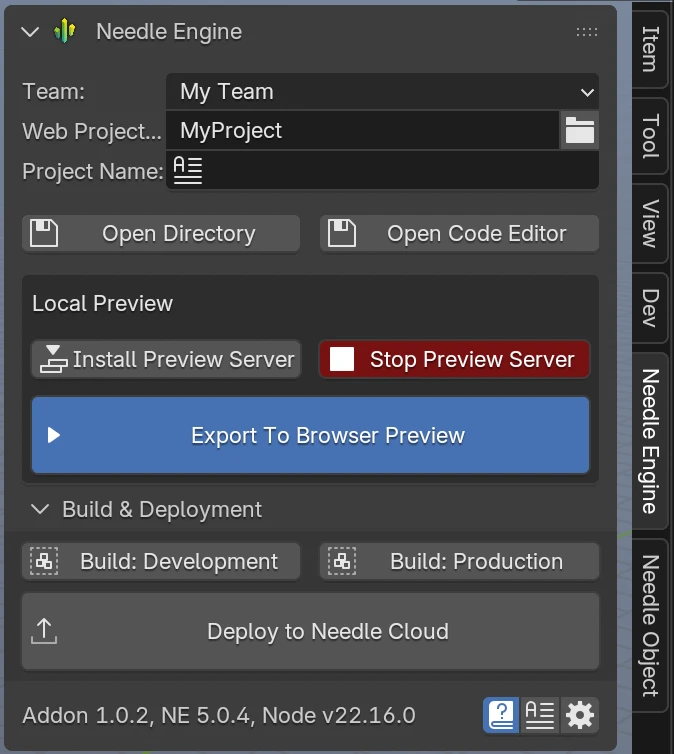
- Build: Development – Export without compression (for debugging)
- Build: Production – Full compression pipeline (texture compression, mesh compression, LOD generation)
- Deploy to Needle Cloud – One-click deploy to Needle's hosting
Preview Compression During Development
Preview how your production output will look and perform without doing a full build.
Unity: Preview Compression toggle
The Needle Engine component has a Preview Compression toggle at the bottom of its Inspector panel. When enabled, the full production compression pipeline runs automatically every time you export your scene during local development (e.g. when clicking Play or saving the scene with auto-export enabled).
This applies the same compression and LOD generation as a production build — including texture compression (KTX2), mesh compression (Draco/Meshopt), and progressive loading LODs — directly to your local development server.
You can also manually trigger compression steps from the context menu on the Needle Engine component under Needle Engine → Compression (e.g. Run Full Compression, Run Compression only, Run LODs Generator, or Clear Caches).
Blender: Auto Compress toggle
In the Needle Engine Project Settings, enable Auto Compress (next to "Export On Save"). When enabled, the production compression pipeline (texture compression, mesh compression, progressive LOD generation) runs automatically after each export — so you can preview production-quality output during local development. This option is off by default.
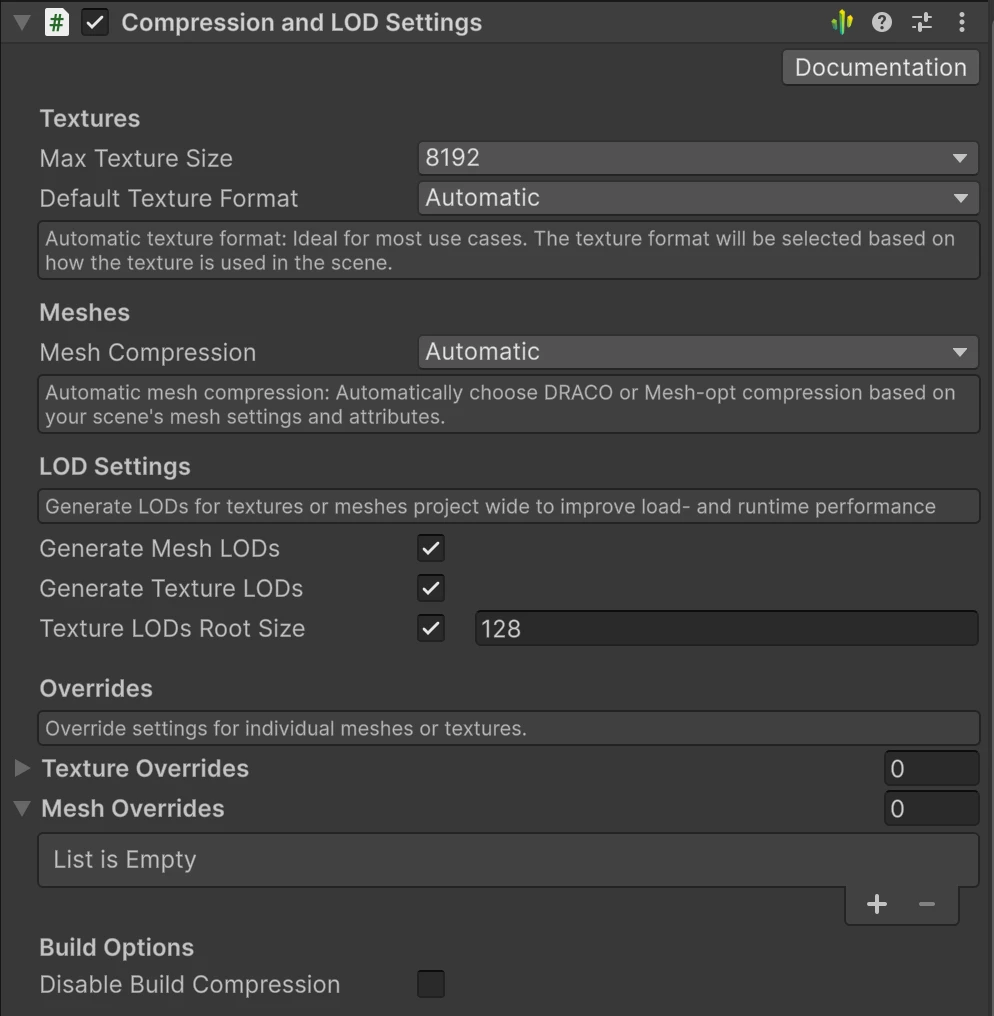
Compression and LOD Settings Component
The Compression and LOD Settings component controls all compression and LOD generation settings for the export. It is located on the Needle Engine / ExportInfo object and lets you configure texture formats, mesh compression, LOD generation, and per-texture or per-mesh overrides.
Node.js is only required during development
The distributed website (using our default Vite template) is a static page that doesn't rely on Node.js and can be hosted on any regular web server.
Node.js is only required if you want to run our minimalistic networking server for multiplayer experiences.
Related Documentation
- Texture Compression — KTX2, ETC1S, UASTC & WebP, per-texture overrides
- Mesh Compression — Draco & Meshopt compression
- Progressive Loading & LODs — Texture LODs, mesh LODs
- Deployment Platforms — Deploy to Netlify, Vercel, GitHub Pages, and more